

Are you tired of seeing the Windows Admin Center (WAC) prompt from Microsoft Windows Server Manager (as shown in Figure 1) and not knowing what to do about it? Do you want to evolve your management experience beyond RDP? If you’re reading this blog, the answer to both of those questions is likely yes.
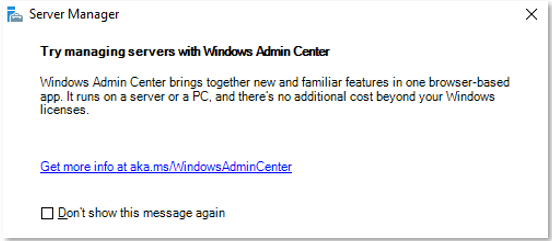
Figure 1 – Managing servers with Windows Admin Center
Most medium and large-sized organizations realize that tiered access is necessary for managing Tier 0 systems. For an introduction to the tiered access model, read the blogs “How to Mitigate Privilege Escalation with the Tiered Access Model for Active Directory Security” and “Use Privileged Access Workstations to Mitigate Security Threats in Your Active Directory.” Systems classified as Tier 0 include domain controllers (DCs), public key infrastructure (PKI) components, Active Directory Federation Services (ADFS), Entra ID Connect, and any components used to manage Tier 0 systems.
A common problem is that when you adhere to the tiered access model, you often remove components from your Tier 0 systems that aren’t managed themselves as Tier 0 systems. Unless you’re in a large environment, having a Microsoft Endpoint Configuration Manager instance or any of the System Center products (or equivalent management systems) dedicated to managing Tier 0 systems isn’t feasible. Until recently, administrators needed to use Server Manager to manage Tier 0 systems at scale.
Windows Admin Center Overview
Partner with Microsoft experts you can trust
If it’s time to take that first step toward leveling up your organization’s security, get in touch with Ravenswood to start the conversation.
Like Server Manager, WAC is a free, ad-hoc management tool. It can manage newer versions of an OS, including Windows client OSs such as Windows 10 and Windows 11—which means it can manage Tier 0 Privileged Access Workstations (PAWs).
No features or role components are required to install WAC. You can install it as a service, which is known as a WAC gateway. You can install extensions from Microsoft and third parties for managing different system components. WAC is a web-based solution that doesn’t depend on a database engine and is extremely easy to implement and maintain.
When accessing WAC, the first page you’ll see is the Connections page. Initially, you’ll only see the WAC gateway listed. However, you can use the built-in AD search to easily add connections. After you connect to an endpoint, you’ll be able to manage it, as Figure 2 shows.
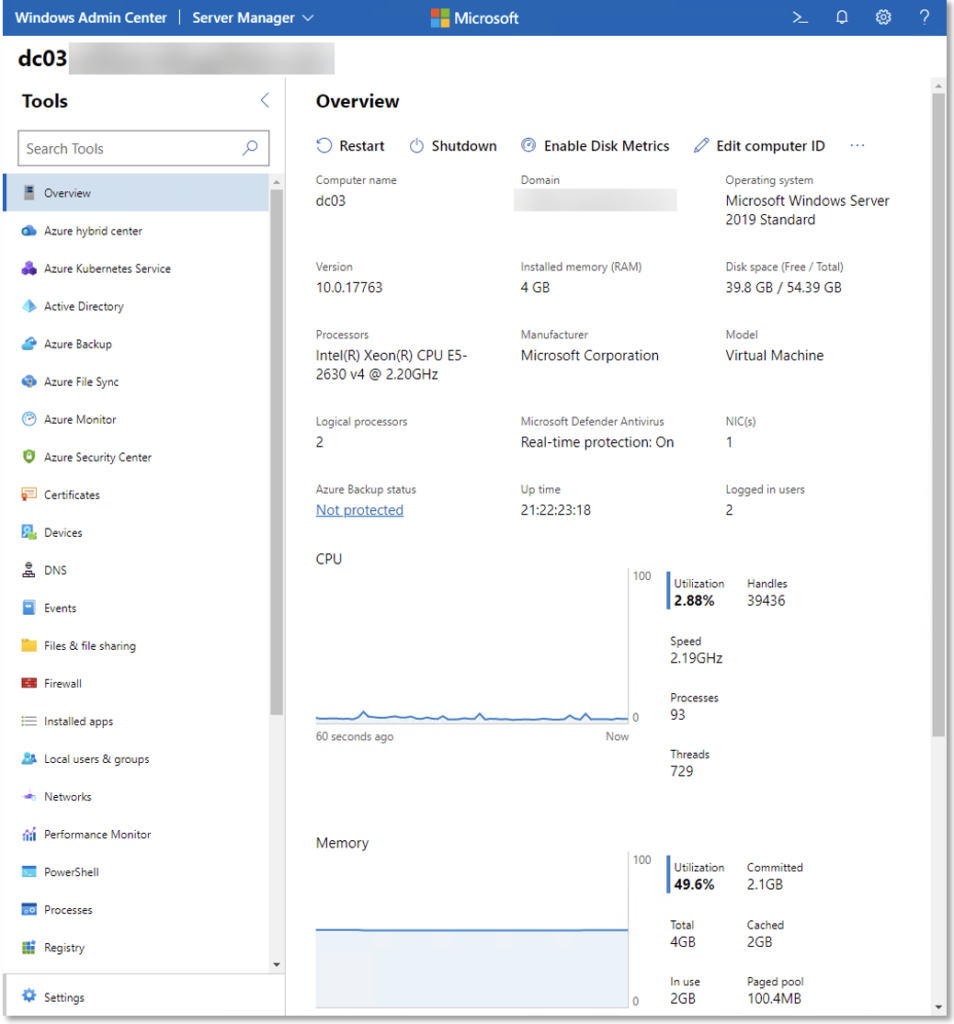
Figure 2 – Established connection to endpoint
Microsoft Management Console (MMC) components that WAC has abstracted include the Event Viewer, certificate management, firewall management, local user and group configuration, scheduled tasks, storage, services, Hyper-V virtual machines (VMs), and virtual switches. Other aspects that WAC has abstracted include Device Manager, File Explorer, Windows Update, network settings, the registry, displaying resource utilization, managing installed software, managing roles and features, and performing network packet captures. WAC also provides an in-browser experience for launching a remote PowerShell session and RDP session. Azure integration allows you to create and manage VMs and aids with migrating workloads to Azure.
WAC has abstracted endpoint management through Windows Remote Management (WinRM). Microsoft provides PowerShell scripts for retrieving information and configuring settings that WAC uses. This allows an administrator to learn what’s happening and can help you in building scripts to automate at scale. With WAC, you no longer need to install the Windows Server GUI or use RDP to manage Tier 0 systems.
Choosing the Correct Implementation
You have two choices when installing WAC: You can install it on a Windows client or on a Windows Server machine. Where you install it will impact the WAC instance’s functionality. To implement WAC in a Tier 0 environment, you should install it on a Windows Server machine. Installing WAC on Windows Server allows it to run as a service. When WAC runs as a service, you get the following benefits:
- Shared Connections, which lets all users see the same list of connections
- Simplified management of Kerberos resource-based constrained delegation for SSO
- Simplified Entra ID authentication to enforce conditional access policies such as multi-factor authentication (MFA)
- Restricted WinRM traffic to your DCs using the WAC instance instead of allowing WinRM traffic from all endpoints
Installing on a Windows client will hinder your WAC experience; you’ll lose important features without gaining any other features. If you’re looking for a quick solution to get up and running so you can get some experience with WAC, a Windows client installation might be appropriate in a sandbox environment. But in a production environment, especially where you’ll be managing Tier 0 systems, installation on Windows Server is the preferred method.
Tier 0 Windows Admin Center Recommendations
Before implementing a Tier 0 WAC instance, you must plan carefully. The following are crucial aspects of planning:
- High-availability WAC instance
- HTTPS encryption of WAC interface
- WinRM HTTPS encryption of management traffic to endpoints
These requirements must be complete before implementing a Tier 0 WAC instance.
Tier 0 systems are the most critical components of an organization. To effectively manage Tier 0 systems, organizations must use every security and availability measure possible; therefore, each of the measures listed above must be implemented.
To achieve high availability, you need a clustered shared volume and a Windows Server cluster consisting of at least two nodes. You must install an SSL certificate on each of the cluster nodes that includes the Fully Qualified Domain Name (FQDN) in the subject. Furthermore, you must install an SSL certificate on each of the Tier 0 systems so that a WinRM HTTPS listener can be established. We recommend using HTTPS because it provides confidentiality, integrity, and authentication.
Figure 3 shows the Tier 0 management architecture.
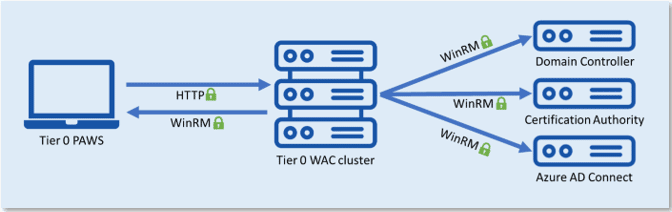
Figure 3 – Tier 0 WAC architecture
Preparing Tier 0 Endpoints
To establish the WinRM HTTPS listener, you must install the certificate on the endpoint and notate the certificate’s subject and thumbprint. We recommend that you make a copy of the Web Server certificate template and name it appropriately, such as _CohoVines-WinRM. The certificate must have the Server Authentication enhanced key usage (EKU), and the subject must match the Hostname property. You can build the subject from AD information by choosing DNS name for the subject name format. On the Security tab of this template, provide the name of a group that contains all Tier 0 systems, or choose Authenticated Users, and provide the Read, Enroll, and Autoenroll rights.
To automate the issuance and renewal of this certificate to prevent management outages, we recommend that you implement auto-enrollment with Group Policy. Once the appropriate certificate is installed on the Tier 0 endpoints, create the WinRM HTTPS listener on each endpoint using PowerShell code like the following:
$ValueSet = @{
    Hostname              = [System.Net.Dns]::GetHostEntry('').HostName
    CertificateThumbprint = '669092239C69899875923914E3F538BEAA54FB77'
}
$SelectorSet = @{
    Address   = '*'
    Transport = 'HTTPS'
}
$WSManParams = @{
    ResourceUri = 'WinRM/Config/Listener'
    SelectorSet = $SelectorSet
    ValueSet    = $ValueSet
}
New-WSManInstance @WSManParams
The CertificateThumbprint information will be different on each endpoint, so make sure you use the appropriate value. You may optionally use a script and schedule a task to run the code automatically, which you may want to do regardless to accommodate binding an automatically renewed certificate to the WinRM HTTPS listener.
To confirm that you created the HTTPS listener successfully, run the following PowerShell code:
$SelectorSet = @{
    Address   = '*'
    Transport = 'HTTPS'
}
$WSManParams = @{
    ResourceURI = 'winrm/config/Listener'
    SelectorSet = $SelectorSet
}
Get-WSManInstance @WSManParam
The output will look like Figure 4.
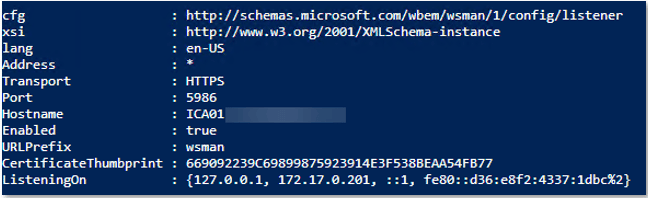
Figure 4 – WinRM HTTPS listener on ICA01.lab.cohovines.com
Lastly, you’ll need to open port 5986 on the endpoint. There is no built-in firewall rule that can be enabled, so you’ll need to create the rule. You can create this rule automatically with Group Policy or manually with the following PowerShell code:
$FwRuleParams = @{
    DisplayName = 'Windows Remote Management (HTTPS-In)'
    Description = 'Inbound rule for Windows Remote Management via WS-Management. [TCP 5986]'
    Direction   = 'Inbound'
    LocalPort   = 5986
    Protocol    = 'TCP'
    Action      = 'Allow'
    Program     = 'System'
    Group       = 'Windows Remote Management'
    Profile     = 'Any'
}
New-NetFirewallRule @FwRuleParams
You should now test WinRM HTTPS functionality using the following PowerShell cmdlet from a remote computer:
Test-WSMan -ComputerName ICA01.lab.cohovines.com -UseSSL Note: The value you provide for ComputerName must match the subject of the certificate for WinRM.
You should harden the WinRM service for Tier 0 systems as shown in Table 1, using Group Policy settings located at Computer Configuration > Administrative Templates > Windows Components > Windows Remote Management > WinRM Service.
| Setting | Value |
|---|---|
| Allow remote server management through WinRM | Enabled |
| IPv4 filter | * |
| IPv6 filter | * |
| Allow basic authentication | Disabled |
| Allow unencrypted traffic | Disabled |
| Specify channel binding token hardening level | Enabled |
| Hardening level | Strict |
| Disallow WinRM from storing RunAs credentials | Enabled |
| Disallow Kerberos authentication | Disabled |
| Disallow Negotiate authentication | Disabled |
| Turn on Compatibility HTTP Listener | Disabled |
| Turn on Compatibility HTTPS Listener | Disabled |
Table 1 – WinRM service settings
Table 2 shows additional settings that you should configure on the WinRM client for Tier 0 systems. These settings are located at Computer Configuration > Administrative Templates > Windows Components > Windows Remote Management > WinRM Client.
Table 2 – WinRM client settings
Installing Windows Admin Center
You are now ready to install WAC. Download and run the installer, which will prompt you to require WinRM over HTTPS, as Figure 5 shows.
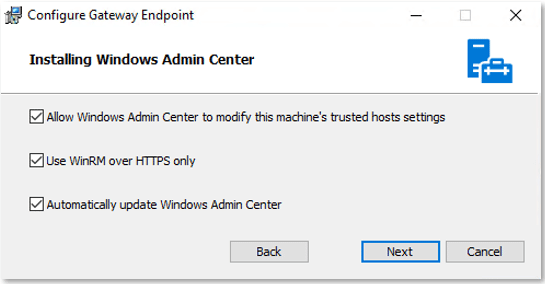
Figure 5 – Configuring WinRM HTTPS enforcement
If you need to change the WinRM over HTTPS setting after installation—or if you installed WAC on Server Core, which doesn’t provide a programmatic method to configure the setting during installation—you can configure the key value WinRMHTTPS with either a 0 (Disabled) or a 1 (Enabled); you can find this key at:
HKEY_LOCAL_MACHINE\SOFTWARE\Microsoft\ServerManagementGatewayThe installer will also prompt you to provide a thumbprint for an SSL certificate that the web service will use, as Figure 6 shows. Don’t use the self-signed SSL certificate; this solution isn’t secure or manageable.
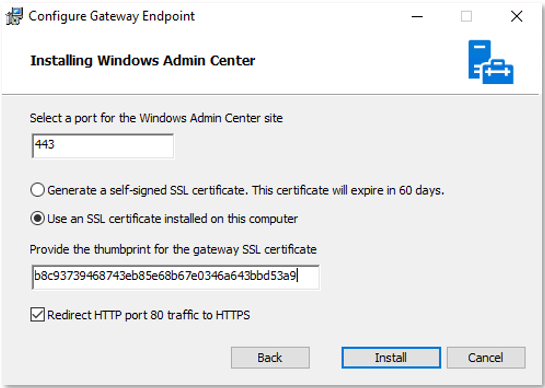
Figure 6 – Configuring WAC HTTPS website binding
If you’re installing on Server Core (which is recommended), use PowerShell code such as the following to install WAC:
$ArgList = @(
    '/i C:\WindowsAdminCenter2110.2.msi'
    '/q'
    '/norestart'
    '/L*v C:\WAC_log.txt'
    'SME_PORT=443'
    'SME_THUMBPRINT=b8c93739468743eb85e68b67e0346a643bbd53a9'
    'SSL_CERTIFICATE_OPTION=installed'
    'MS_UPDATE_OPT_IN=yes'
)
$MSIArgs = @{
    FilePath     = 'msiexec.exe'
    ArgumentList = $ArgList
    Wait         = $true
}
Start-Process @MSIArgs
Ensure that the MSI file path and certificate thumbprint are correct. Once installation has completed, you can access the WAC instance via a browser, using https (e.g., https://wac.lab.cohovines.com). If you choose the manual approach when adding connections, you must use the FQDN of the endpoint, which matches the subject of the WinRM HTTPS certificate. Adding a connection using AD Search automatically uses the FQDN. Remove Builtin\Users from authenticating to the gateway, and add any appropriate Tier 0 user groups with the User role such that the allowed groups resemble those shown in Figure 7.
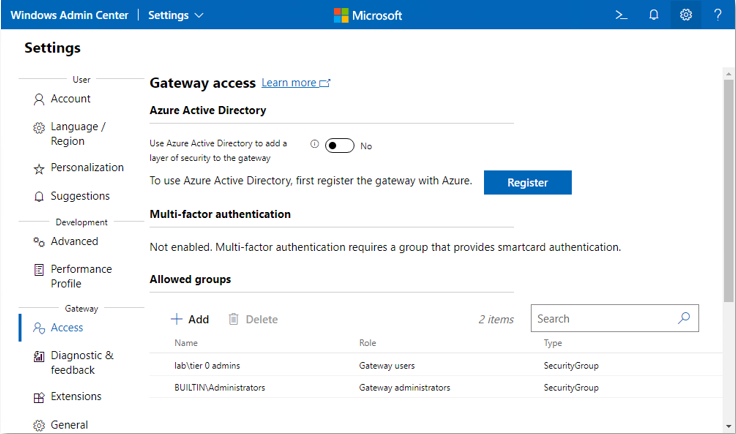
Figure 7 – WAC gateway access
Remove users and groups from the local Administrators group on the server(s) hosting WAC that aren’t Tier 0, and allow only Tier 0 PAWs to access the Tier 0 WAC instance. You’re now ready to start adding connections to your Tier 0 systems. If you’re adding connections to systems that run Windows 10 or 11, you must set the WinRM service to start automatically, which can be accomplished using Group Policy if desired.
Summary
Tier 0 management is important. Stay secure by implementing a dedicated Tier 0 WAC instance with high availability and secured communication traffic. If you need help with implementing a Tier 0 WAC instance, reach out to the experts at Ravenswood Technology Group. Contact us today!